
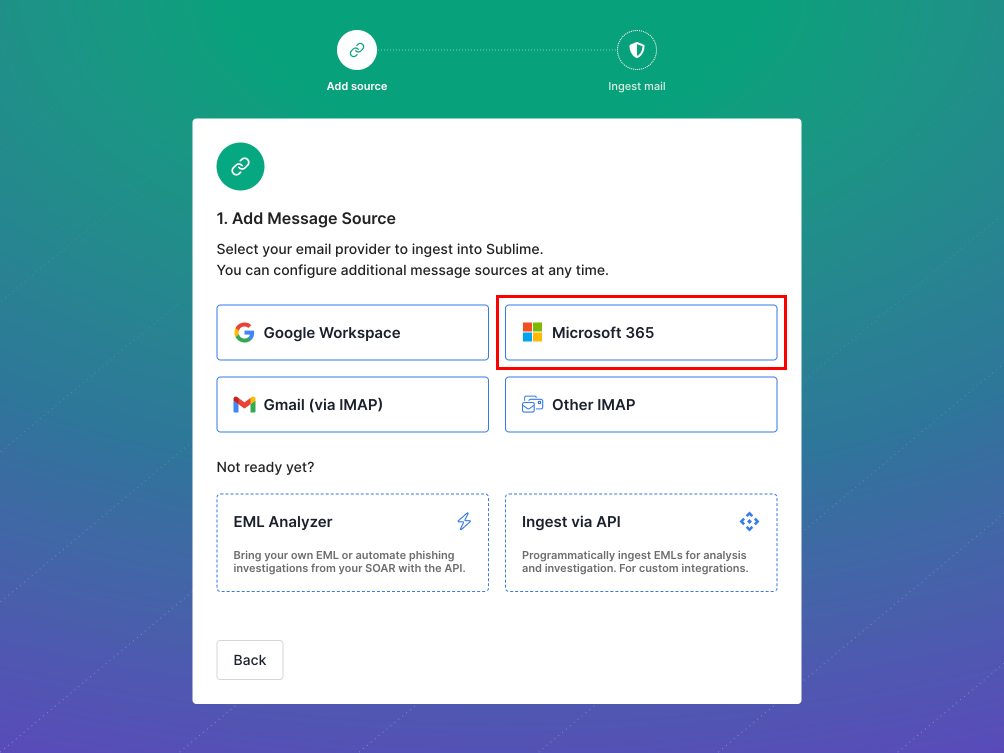
Add a Microsoft 365 message source
Overview
Microsoft 365 Global Admin Required
You must be a Global Admin in Microsoft 365 to authorize access for all users on your domain.
You can add a Microsoft 365 message source when setting up your Sublime organization or by going to Admin > Message Sources > New message source in the Sublime dashboard and selecting Microsoft 365.
Once you select the option to add a Microsoft 365 message source, the next steps will depend on whether you're using Sublime Cloud or self-hosting Sublime.
Sublime Cloud (Fully Managed)
If you're using Sublime Cloud, simply select "Microsoft 365" and follow the prompts to authorize access on behalf of your organization.
Self Managed
In order for your self-hosted instance of Sublime to access mail from your tenant programmatically, you must create a new Azure app and authorize it for access. This is required so that only you have access to your mail, and not anyone else, including the Sublime team.
After completing the steps below, you'll copy over the following to add the message source in Sublime:
- Application (client) ID
- Directory (tenant) ID
- Client secret
Steps
- Login to https://portal.azure.com
- Search for
App registrations

- Click
+ New registration

- Enter "Sublime Platform" for the app name. Leave the other defaults (Single-tenant, no Redirect URI). Click "Register".

- Copy the application (client) ID and the Directory (tenant) ID over to the Sublime Platform setup

- Click
View API permissionsand then+ Add a permission
- Select
Microsoft Graph - Select
Application permissions - Choose
Mail.ReadWrite,User.Read.All,Group.Read.All, andDomain.Read.All - Click
Add permissions
- Then,
Grant admin consentfor your domain. Note that if this button is greyed out for you, you may need to have a Domain Admin grant the consent.

You should see green checkmarks like this:

- Navigate to
Certificates & secretsin the sidebar

- Create a new Client secret. Enter "Sublime Platform" for the description and choose "24 months".

- Copy the client secret "Value" over to the Sublime Platform setup.
🎉 That's it!
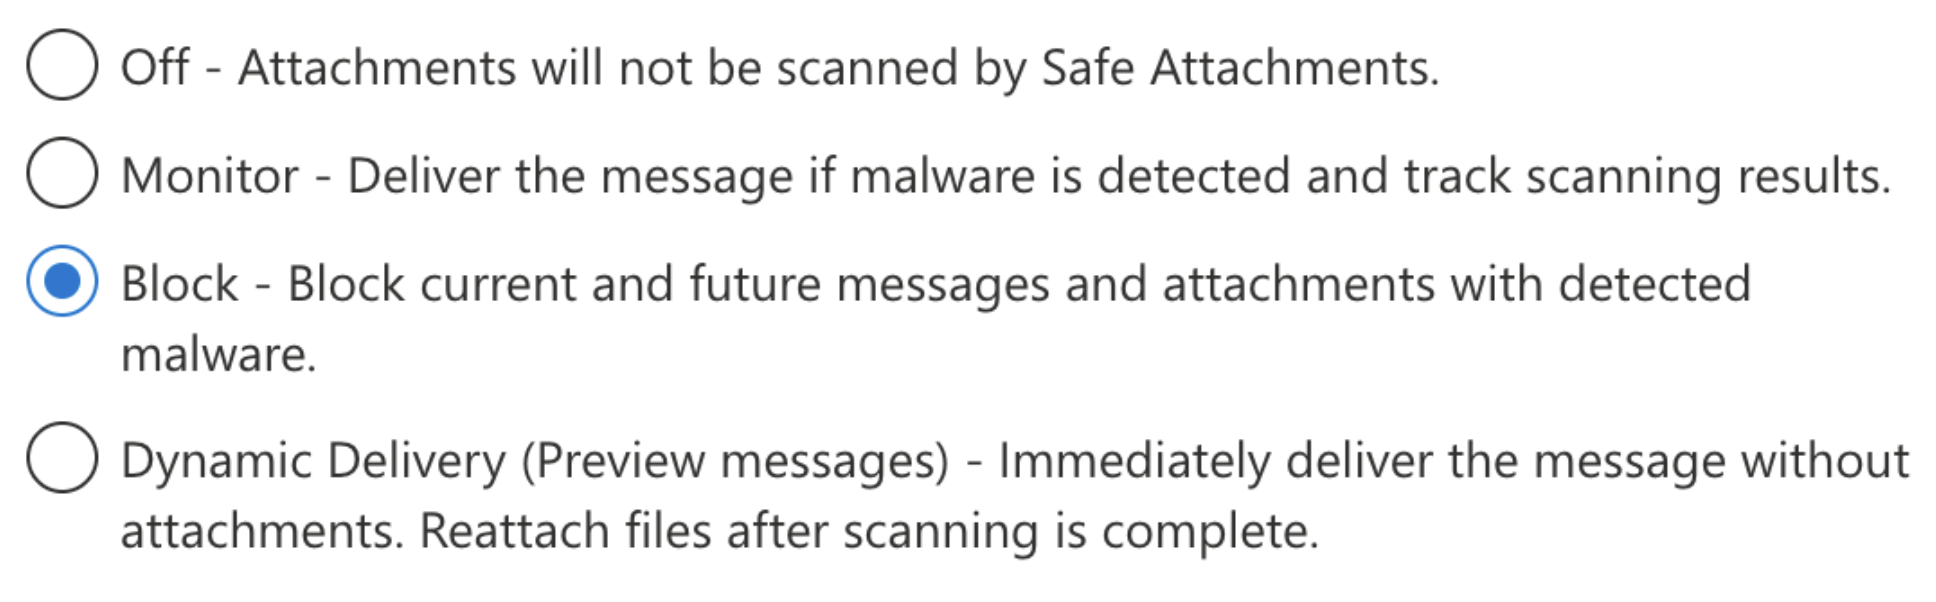
Safe Attachments Recommended Policy Settings
If you have Safe Attachments enabled, the Dynamic Delivery unknown malware response setting will cause issues with scanning in Sublime. Specifically, Sublime currently does not scan attachments that are placed back into a message post-delivery.
Any of the other settings will work with Sublime (Block, Monitor, or None). In order to get the best of Microsoft and the best of Sublime together, our recommendation is Block (also Microsoft's recommended and default setting).
Authorizing a Subset of Mailboxes
If you wish to restrict the access of the Sublime Azure app to a subset of mailboxes while testing out the Platform, you can do so using the New-ApplicationAccessPolicy cmdlet in PowerShell .
To do so, you'll need to first install the Exchange Online PowerShell module if you don't already have it. This can be done by copying and pasting the command found on Microsoft's PowerShell Gallery listing for the module (the link can also be found on the corresponding docs page).
Now, in PowerShell, the module needs to be imported and the tenant authenticated.
First, run:
Import-Module ExchangeOnlineManagement
Then, replacing {EMAIL_OR_UPN} with your applicable email address or UserPrincipalName:
Connect-ExchangeOnline -UserPrincipalName {EMAIL_OR_UPN}
This should open a prompt in a web browser to complete authentication. Once successfully authenticated, we can now create a new ApplicationAccessPolicy to restrict access of the Azure app to specific mailboxes.
The below command creates an application access policy to restrict access to the user or group email specified. Be sure to replace {APP_ID} with the value for Application (client ID) for the Azure app that was created as part of the setup above. Replace {USER_OR_GROUP_EMAIL}with the user or group you'd like to allow access for.
New-ApplicationAccessPolicy -AppId {APP_ID} -PolicyScopeGroupId {USER_OR_GROUP_EMAIL} -AccessRight RestrictAccess -Description "Restrict access to Sublime app"
Allowing Multiple Mailboxes or Groups
To authorize multiple different mailboxes or groups, repeat the above command once for each mailbox or group, replacing the value of
{USER_OR_GROUP_EMAIL}with each email address. All accounts with an ApplicationAccessPolicy created with the above AccessRight will be accessible from the Sublime Platform.
Updated 5 months ago